
Hi again! As I’ve begun to gain some experience in building rpm packages, I’ve decided to continue and try to build this useful app for AlmaLinux OS 8 and AlmaLinux OS 9.
About
Warpinator, a file-sharing tool by Linux Mint, exemplifies their commitment to a seamless user experience. We owe its success to the dedicated contributors - thank you!
Originally designed for Debian-based Linux, Warpinator has grown to serve Windows, Android, iOS, and now RPM-based Linux distros, expanding its capabilities to an increasingly diverse user base.
Building process
Requirements
- AlmaLinux machine - bare AlmaLinux OS 8 and AlmaLinux OS 9 machines are enough to build packages locally.
- Installed
git- using the dnf install git-all. mocktool - I followed the AlmaLinux Building Packages Guide to install mock and use it.- Enabling additional repositories. The enabling commands were taken from the AlmaLinux Wiki Repositories page unless otherwise noted:
- EPEL
- PowerTools (CRB)
- Devel - you can check my previous blog post to see how to enable this repo not server-wide but by changing the mock configuration.
Finding the sources
I used the Building Packages Guide from AlmaLinux Wiki to build packages.
As there isn’t any source rpm to unpack and create directory structure using rpm -i command, had to create rpmbuild directory to build rpm packages:
mkdir -p ~/rpmbuild/{BUILD,RPMS,SOURCES,SPECS,SRPMS}
Or run the two commands below to create the RPM building environment:
dnf install rpmdevtools
And then
rpmdev-setuptree
Now, to rebuild a package, a source file (an archive like .tar.gz) and spec file are required to be present in the rpmbuild directory.
Where did I get them?
Linux Mint has an official Warpinator repository which contains archive .tar.gz files for different versions. So I downloaded the suitable version and put it into rpmbuild/SOURCES folder.
This repository also luckily has a spec file which I also downloaded and put into rpmbuild/SPECS folder.
Building Warpinator locally
I used the mock tool to build packages locally, you can find the guide on how to use it in the wiki - AlmaLinux Building Packages Guide.
I also needed to use my local repository again, I’ve described using the createrepo_c commands before.
The first attempt to build Warpinator for AlmaLinux OS 9 failed and I had to research and fix the spec file (this wasn’t totally unexpected but I had my hopes). To do so, I looked through the original warpinator repository and debian files to adjust my .spec files.
Mostly all needed packages are already present in AlmaLinux OS repositories. So it left me just a few additional missing packages to build and make some corrections in warpinator’s .spec file.
| Package | AlmaLinux OS version 8 | AlmaLinux OS version 9 | Comment |
|---|---|---|---|
python-ifaddr | ✅ | ✅ | |
python-zeroconf | ✅ | ✅ | |
xapps | ✅ | ||
grpc | ✅ | spec changes - Replaced fedora with almalinux in %prep section to build for AlmaLinux OS 8 | |
warpinator | ✅ | ✅ | AlmaLinux OS 8 spec changes: - Removed python3-google-api-core from Requires- Added python3-protobuf, python3-netaddr, python3-ifaddr to Requires- Added -Dbundle-zeroconf=false option to %meson- Fixed org.x.Warpinator.desktop, org.x.Warpinator.appdata.xml dirsAlmaLinux OS 9 spec changes - Removed python3-google-api-core, python3-xapps-overrides from Requires- Added python3-protobuf, python3-netaddr, python3-ifaddr to Requires- Added -Dbundle-zeroconf=false option to %meson- Fixed org.x.Warpinator.desktop, org.x.Warpinator.appdata.xml dirs |
It took several more attempts to succeed. And now, with these packages and changes, I finally built warpinator.
I checked the versions to be workable, uploaded all the sources to git.almalinux.org and built them all again but using AlmaLinux Build System this time.
I had this experience with git.almalinux.org, AlmaLinux Build System and commuity repositories described in my previous blog post either, so you are welcome to check it there.
Installing Warpinator
Warpinator packages are available in AlmaLinux’s community repository for both AlmaLinux OS 8 and AlmaLinux OS 9 - warpinator.
To install it on Almalinux you need to:
Enable EPEL and PowerTools repositories.
Install core dnf plugins that contain COPR plugin:
dnf install dnf-plugins-coreDownload the AlmaLinux configuration file in your system:
curl -o /etc/dnf/plugins/copr.d/almalinux.conf https://raw.githubusercontent.com/AlmaLinux/albs-web-server/master/reference_data/almalinux.confEnable the
warpinatorcommunity repo:dnf copr --hub build.almalinux.org enable sboldyreva/warpinatorInstall
warpinator:dnf install warpinatorNow there are a few more adjustments to firewall settings:
Check firewalld is active:
sudo firewall-cmd --stateIf the output is
runningconfigure firewalld.Download the latest Warpinator service file from the upstream firewalld repository:
sudo curl -LO https://raw.githubusercontent.com/firewalld/firewalld/master/config/services/warpinator.xmlAdd “warpinator” service from the file:
sudo firewall-cmd --permanent --new-service-from-file=warpinator.xmlReload the firewalld:
sudo firewall-cmd --reloadsudo firewall-cmd --add-service=warpinator --zone=publicMake current firewall configuration permanent:
sudo firewall-cmd --runtime-to-permanentMake sure you can see
warpinatoras a service listed output:sudo firewall-cmd --zone=public --list-servicesCleanup: Delete the service file for warpinator:
rm warpinator.xml
Troubleshooting
Check if these ports are set in Warpinator settings:
- Incoming port for transfers: 42000
- Incoming port for registration: 42001
- If the ports mentioned above are correct but machines still cannot see each other, then try to add 5353/udp port to warpinator:
sudo firewall-cmd --add-port=5353/udp
- If the ports in Warpinator settings differ from those mentioned above, try adding the needed ports manually using CLI instead of configuring firewalld Configuring firewalld with warpinator.xml:
sudo firewall-cmd --add-port=port-number/port-type
Make the new settings persistent:
sudo firewall-cmd --runtime-to-permanent
Check the setting to be sure:
firewall-cmd --list-all
The Example output you should see:
 public (active)
  target: default
  icmp-block-inversion: no
  interfaces: enp1s0
  sources:
  services: cockpit dhcpv6-client ssh
  ports: 5353/udp port-number/port-type
  protocols:
  forward: no
  masquerade: no
  forward-ports:
  source-ports:
  icmp-blocks:
  rich rules:
- For more troubleshooting tricks you might find useful, please, check the original Linux Mint’s Warpinator Repository.
Using Warpinator App
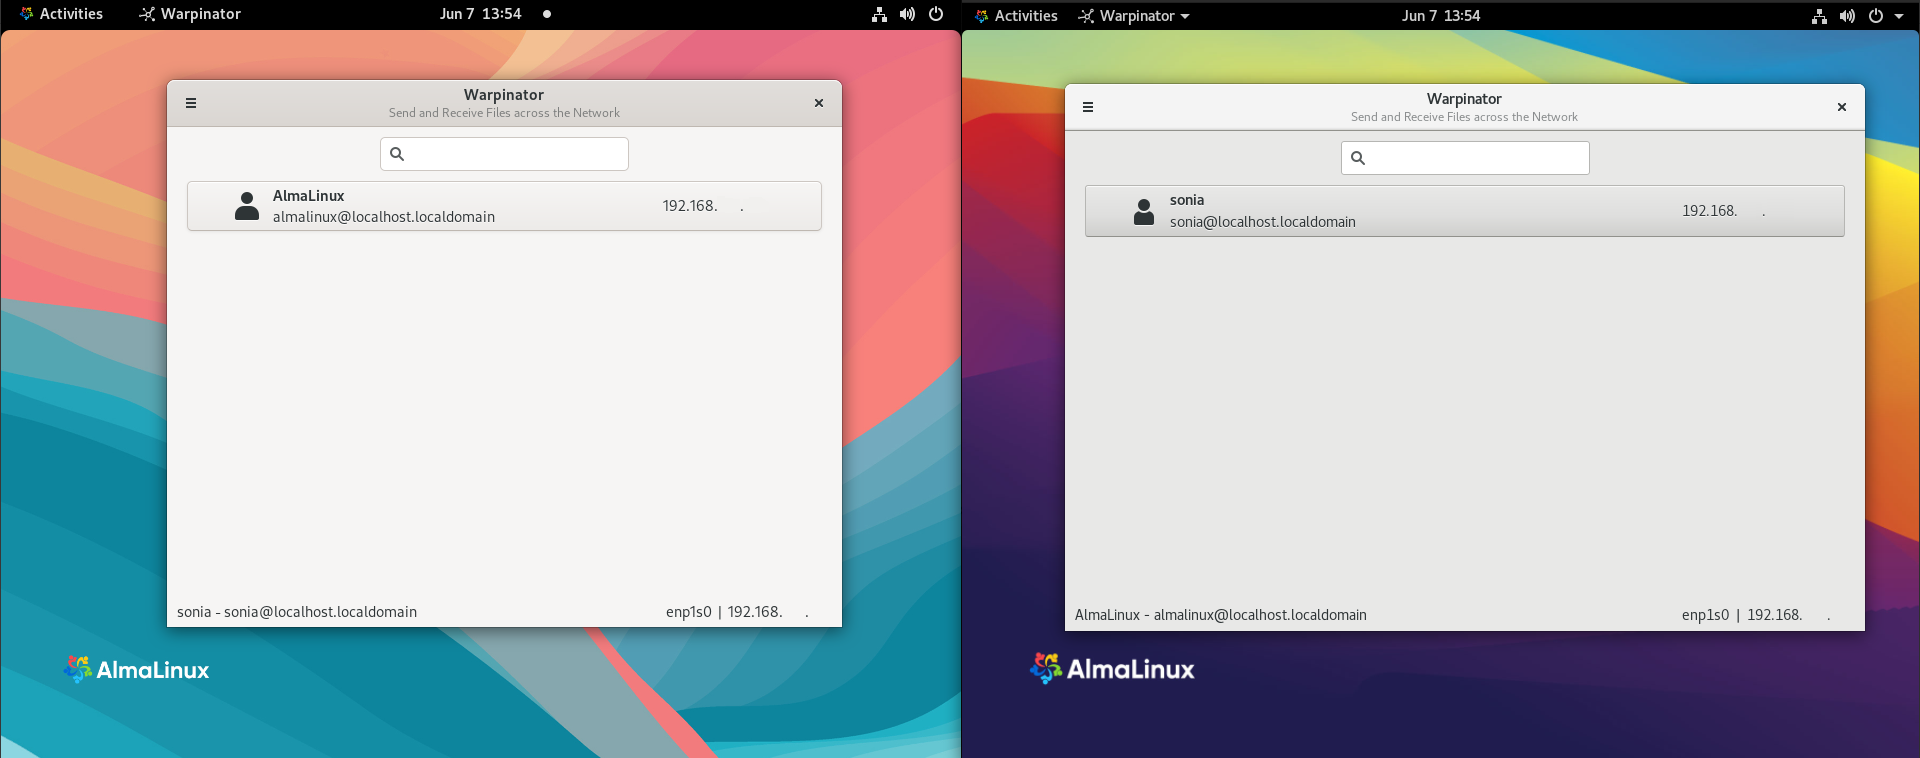
To use Warpinator to send and receive files, the devices should be in the same network. They’ll automatically appear whether they’re located in the app’s main screen.
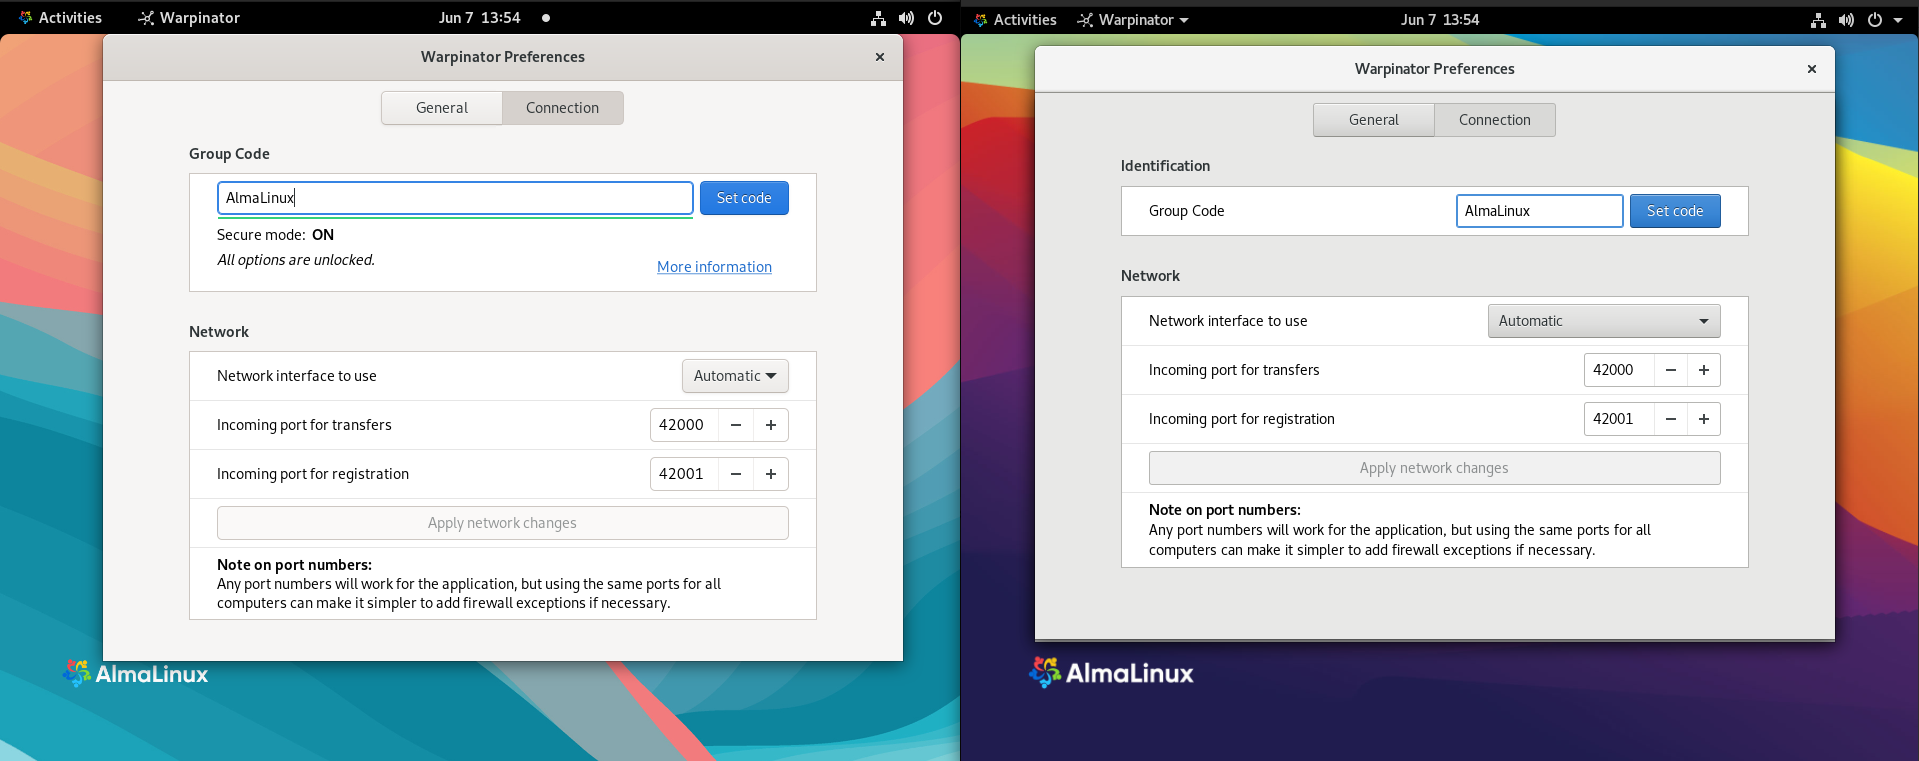
For users’ safety, it’s highly recommended to set a ++Group Code++.
The group code is a shared key that allows trusted devices on the local network to see one another in Warpinator. Any devices you wish to connect with must be using the same group code. This code is set to ‘Warpinator’ by default.
To set the code got the side menu on the left side and choose Preferences.
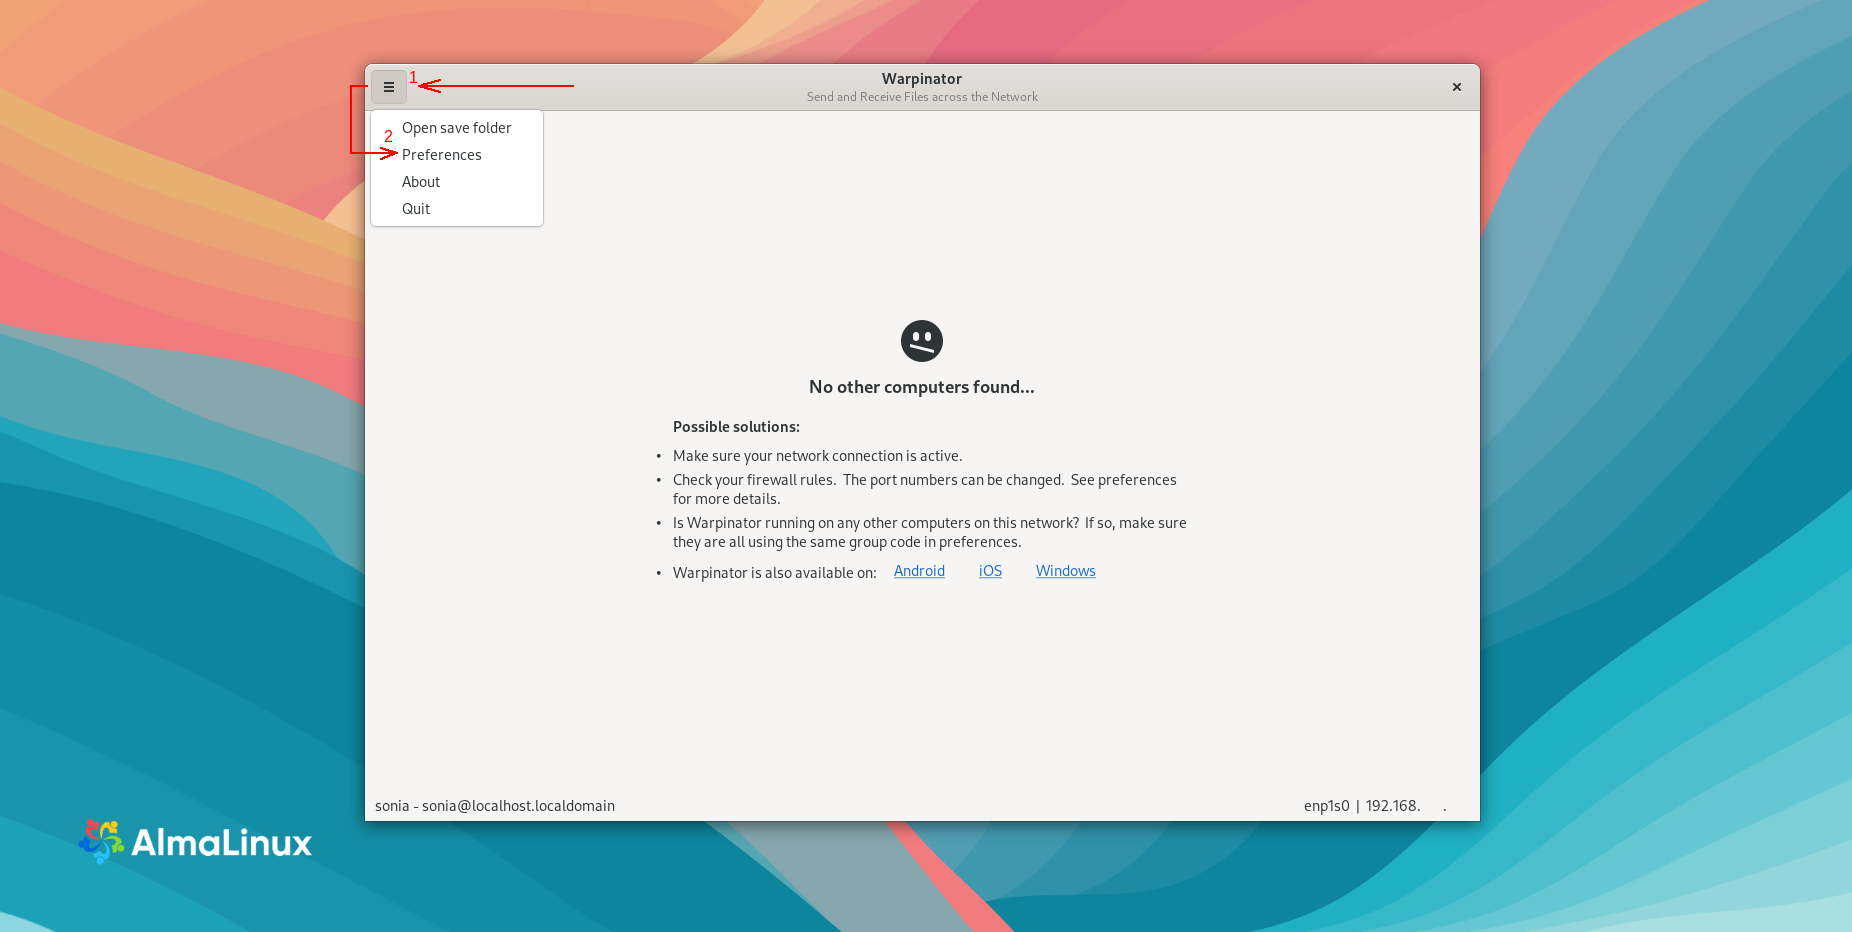
Now switch to the Connection tab and set the Group Code following the recommendations.
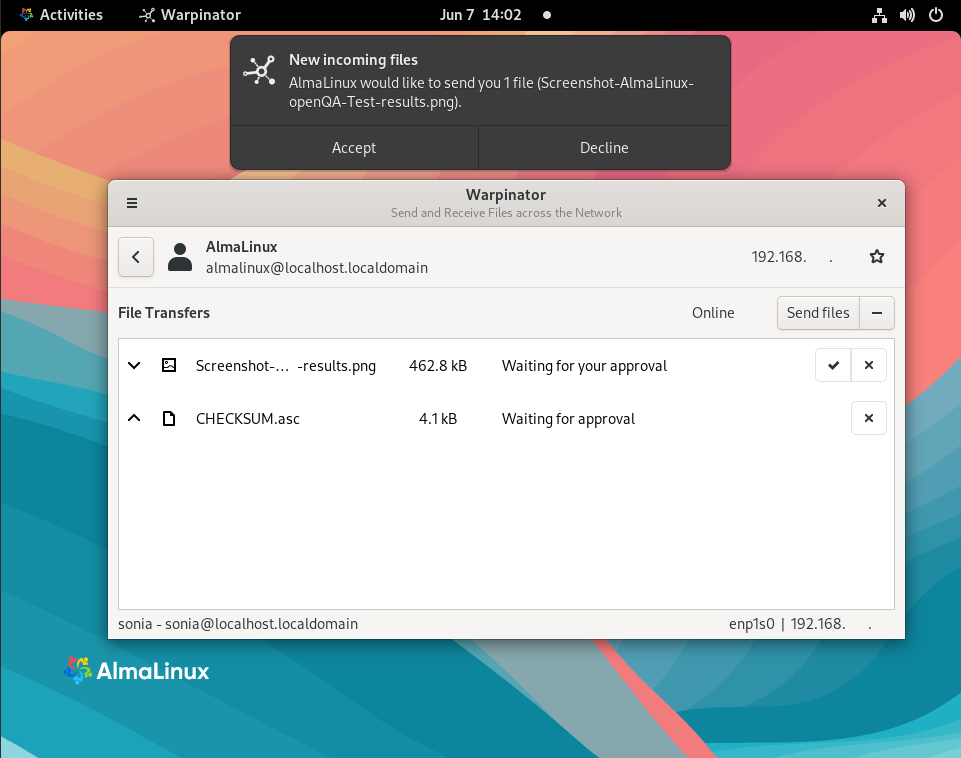
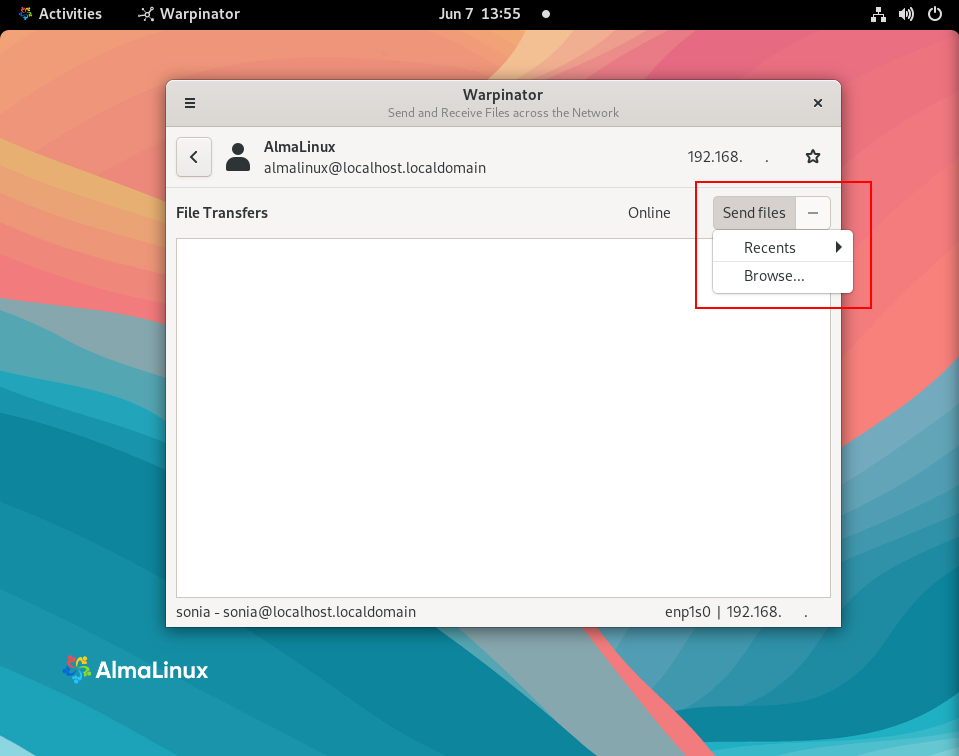
To send the file to another device click on it in the list of available devices and click the Send button.
You’ll get a notification when a device has a request to approve or decline a file receiving.
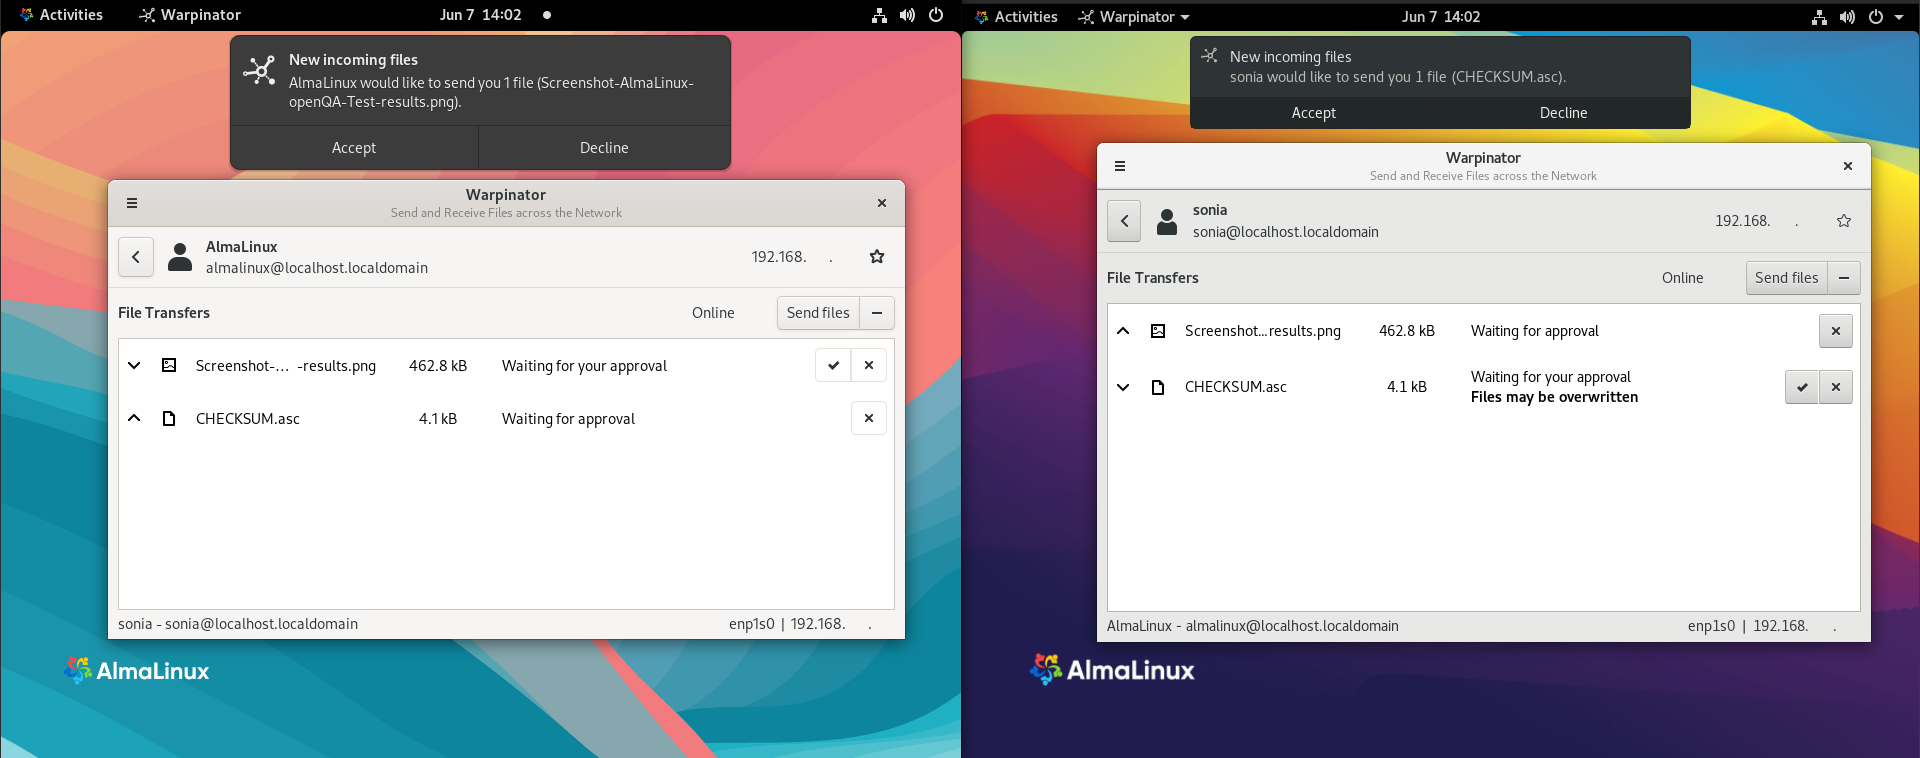
Enjoy the Warpinator app!